

Imagine you want to run a program on a computer, but you don't want to deal with setting up the computer itself. Azure Container Apps is like a service that lets you do just that for certain programs.
Normally, running these programs (called containerized applications) involves managing servers, which can be complicated and expensive. Azure Container Apps takes care of all that for you. You just provide your program, and they handle the computers and technical details to keep it running smoothly and securely. This saves you time and money.
Pre-requisite and installments
Azure subscrption account
Azure cli installed
logged in your code editor to your account
Docker installation on your local machine
Create a registory on azure (registory is like repository for your docker image )
Example our code has repostory in github with all its version similary docker image has registory
Step 1: Create Basic React application
npx create-react-app my-app
Create-react-app will create Basic React application and the builder folder will be names as build by defaul. try runnng npm build
It will cretae a build folder . However, if you create react or other app using vite with the following cmd
npm create vite@latest my-app
this cmd will allow you to choose framework like react, vue, next. if you create you frontend applcation using this tool and try to create build of your application then the build folder will be named as "dist" by default
Step 1: Create "nginx" folder inside root folder of your applcation and a Dokerfile .

Step 3: Create nginx.conf file inside nginx folder. We are using ngix webserver to server our frontend. since our react app is decoupled from any backend server .
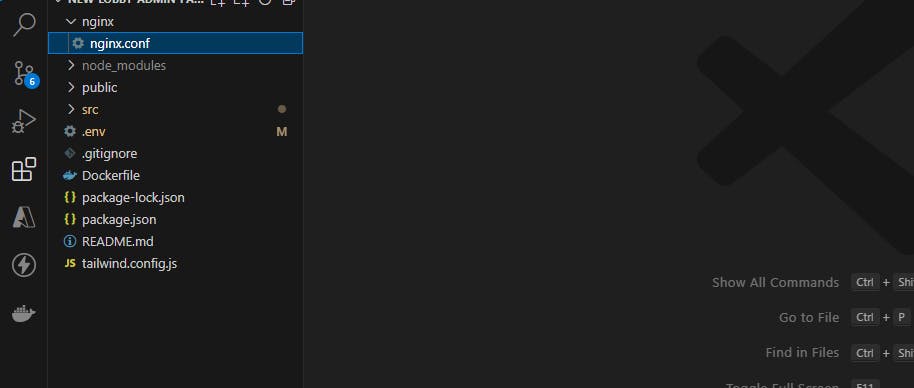
Step 3: Add the following code in nginx.conf file
worker_processes  1;

events {
  worker_connections  1024;
}

http {
  server {
    listen 80;
    server_name  localhost;

    root   /usr/share/nginx/html;
    index  index.html index.htm;
    include /etc/nginx/mime.types;

    gzip on;
    gzip_min_length 1000;
    gzip_proxied expired no-cache no-store private auth;
    gzip_types text/plain text/css application/json application/javascript application/x-javascript text/xml application/xml application/xml+rss text/javascript;

    location / {
      try_files $uri $uri/ /index.html;
    }
  }
}
Step 4: Now lets write our dockerfile. here is the tick.
If you have created your frontend usng vite you the 1st code snippet inside dockerfile.
If you have created your frontend using create-react-app then use the 2nd code snippet inside dockerfile.
FROM node as dist
WORKDIR /app
ENV REACT_APP_SERVER_URL Replace_with_your_api
COPY ["package.json", "package-lock.json*", "npm-shrinkwrap.json*", "./"]
RUN npm install
COPY . .
RUN npm run build
FROM nginx
COPY ./nginx/nginx.conf /etc/nginx/nginx.conf
COPY --from=dist /app/dist /usr/share/nginx/html
FROM node as build
WORKDIR /app
ENV REACT_APP_SERVER_URL Replace_with_your_api
COPY ["package.json", "package-lock.json*", "npm-shrinkwrap.json*", "./"]
RUN npm install
COPY . .
RUN npm run build
FROM nginx
COPY ./nginx/nginx.conf /etc/nginx/nginx.conf
COPY --from=build /app/build /usr/share/nginx/html
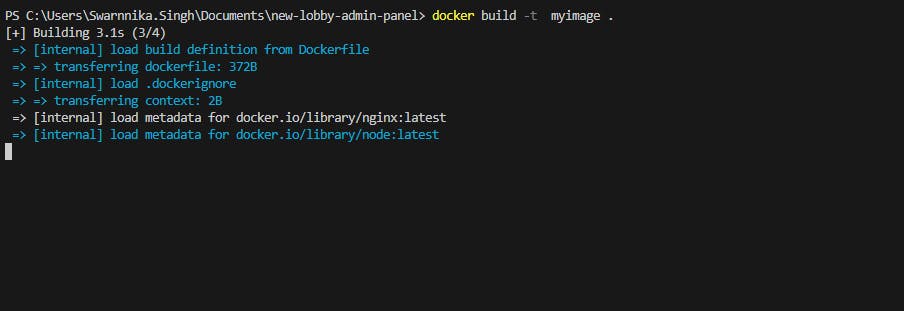
Step 4: Now time to create our docker image
cd yourproduct-rootfolder
docker build -t myimage .
Above cmd will start creating image for you. if everything is fine you fill find some consoles like this .
If you gets any error like docker daemon is not runnng then you need to start your docker destop and try re-runnng the cmd
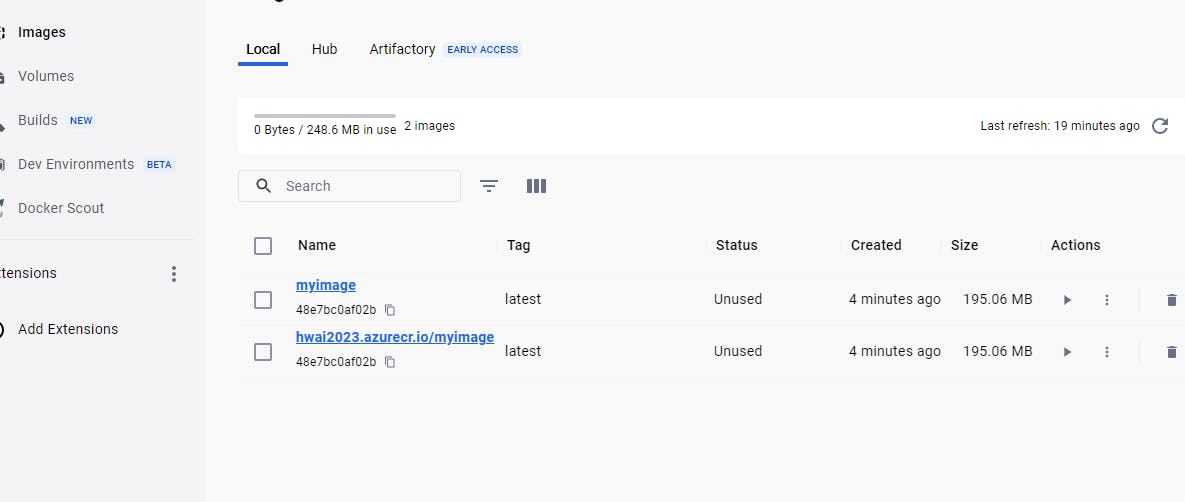
If you have succesfully create your image then you can see those image in you docker destop.
Step 4: Try Runnning docker image locally
docker run -it --rm -p 8080:80 myimage
you can try hitting 8080 on browser if runnng well you can push the image to azure repository in order to deploy as container app.
Step 4: Tagging and Pushing image to azure repository
docker tag imagename myregistry.azurecr.io/imagename:latest
docker push myregistry.azurecr.io/imagename:latest
pushing image will show some consoles on your editor like

Step 4: Check your repository if you have succesfully pushed the image on azure regstory or not.
Go to azure platform ==>Go to contaner registory ===>search "myregistory"==> search "mymagename"

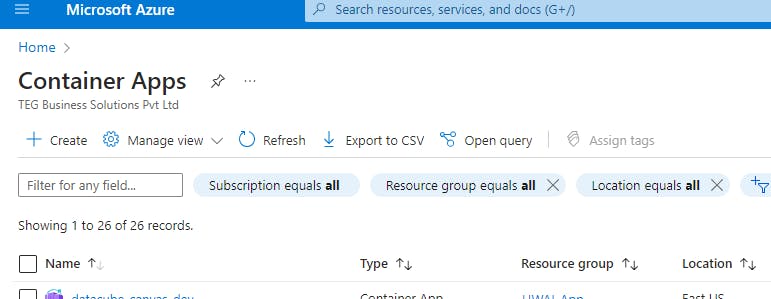
Step 5: Deploy your image to container app
Go to azure platform home page==> go to container apps ==> click on create button
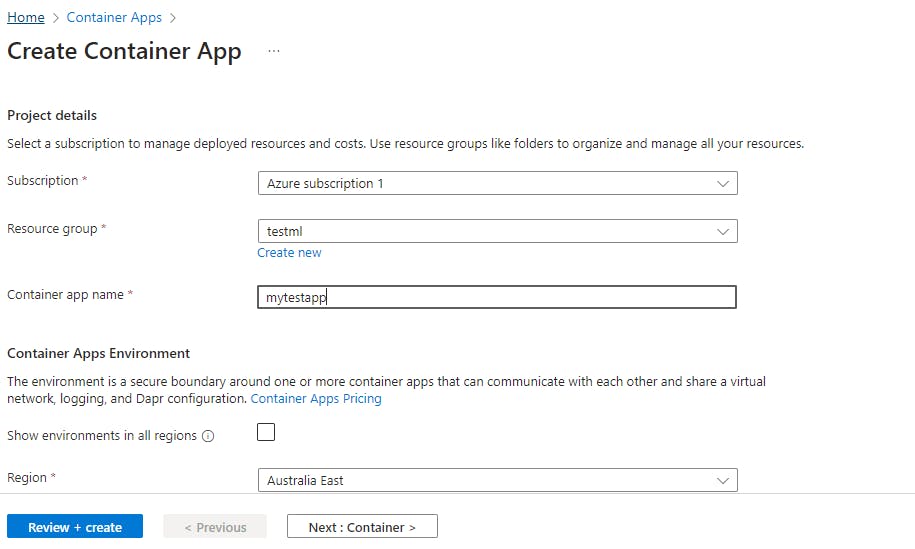
Click create option will land on create page
Fill all project details
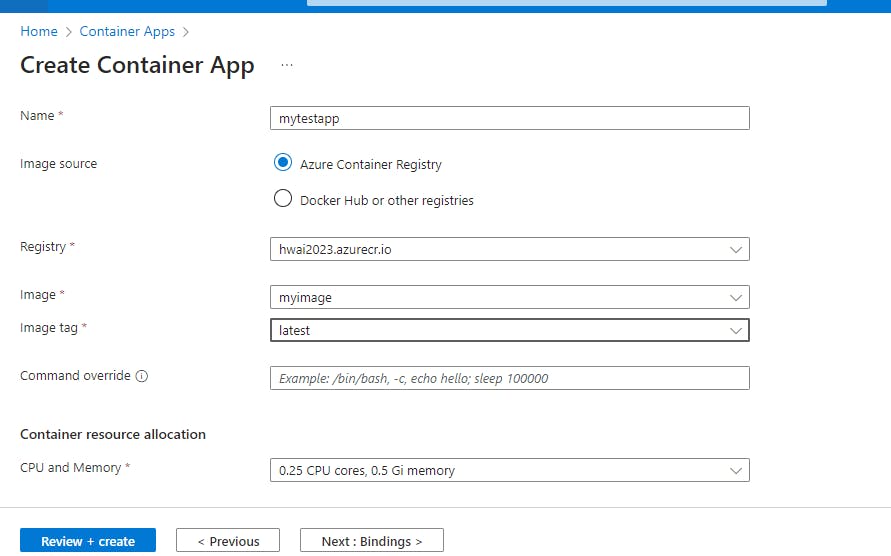
Next container: Give a unique name, select your registory and image that was pushed to the registory
Next Binding - keep it default
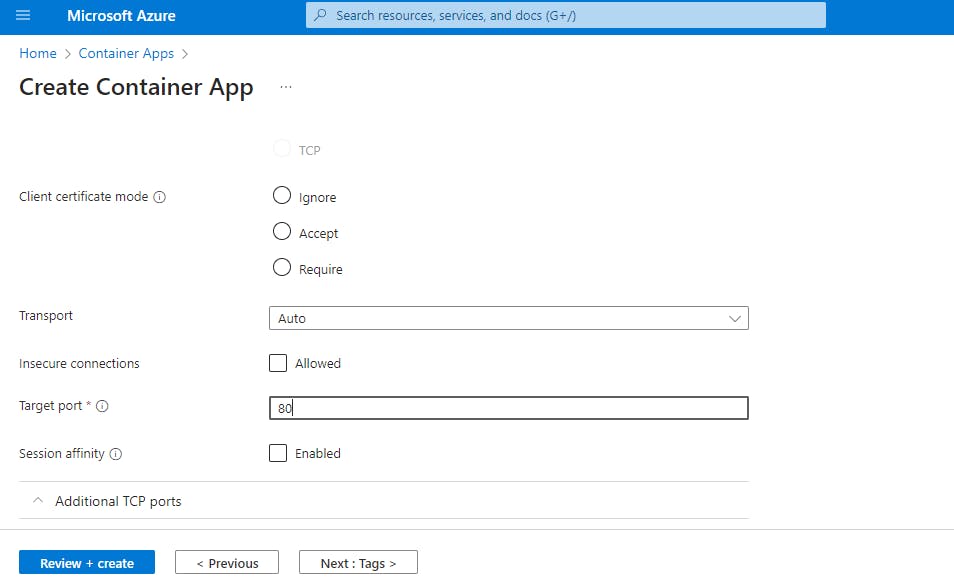
Next Ingress - Enabled Ingress and allow traffic
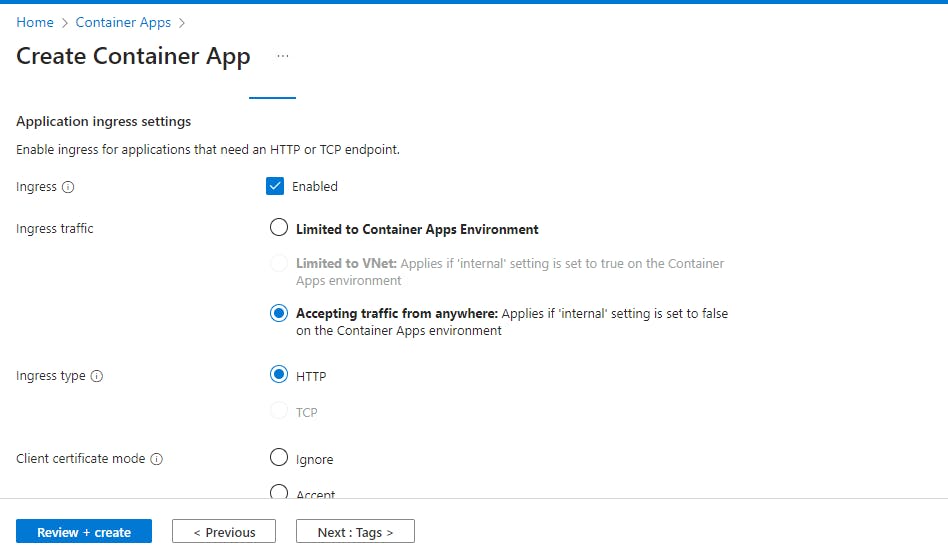
Keep other things default . Add port no 80
Next click Tags and make no changes
Next click Reveiw and Create
This will perform all validation and indcate with text passed
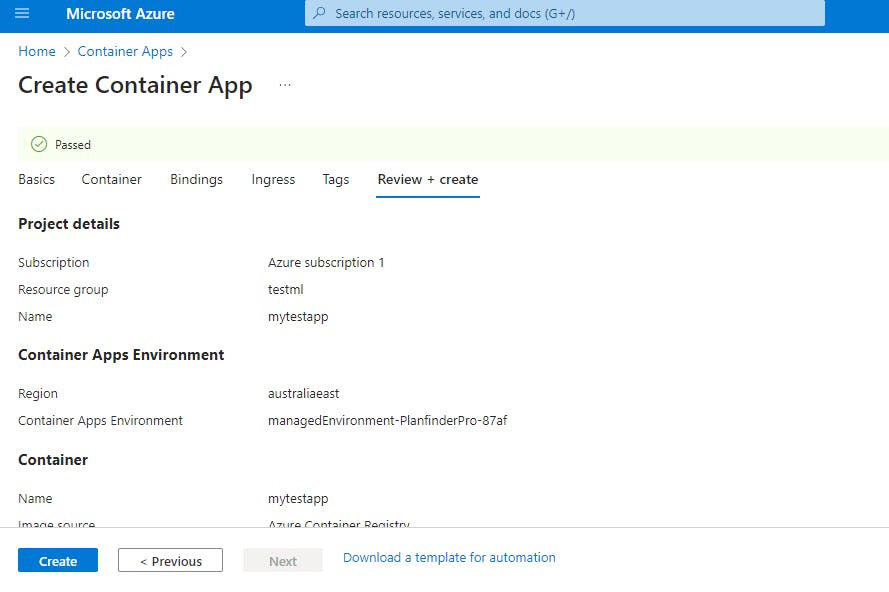
Finally you can click create to deploy
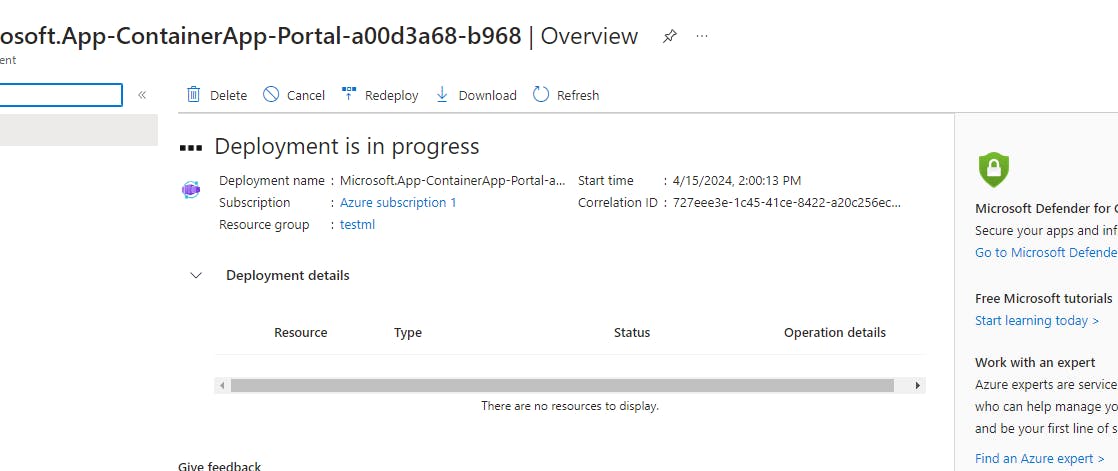
Then you can see Deployment in progress screen like this and followed by go to resource after successfull deployment.
Click on go to resource will land you to the the resource page where you can see a application url. you can hit this application url in your browser and your applicaton is ready.
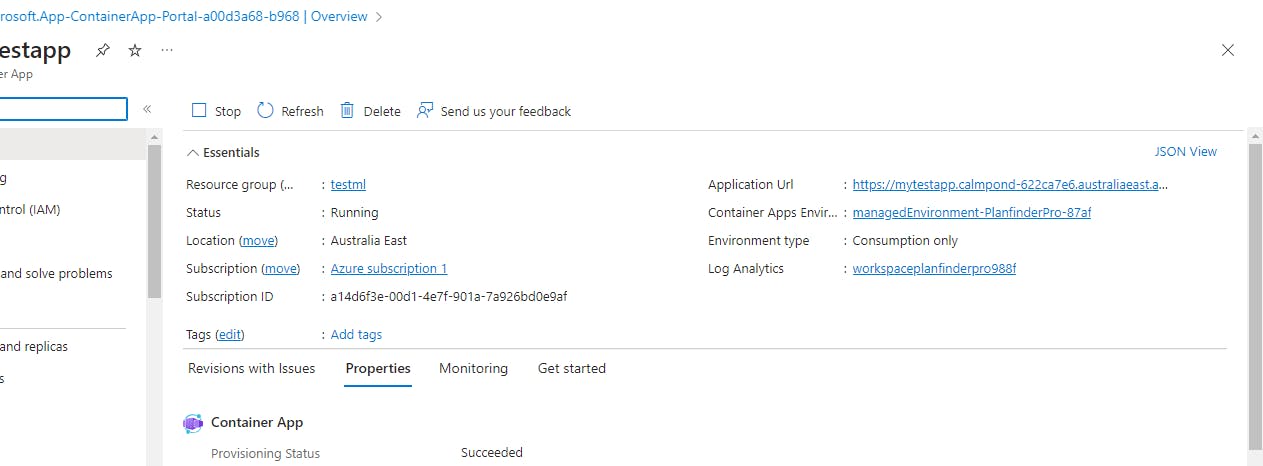
Congratulations you have successfully deployed your frontend as a contaner apps on azure